
Quite a while ago I promised you guys a pictorial of the tubular bind off. It took 8 months, but here it is.
I learned this technique via Montse Stanley’s Knitter’s Handbook. I thoroughly recommend the book. It covers a lot of topics and the illustrations are good. There are 30 pages on cast ons and bind offs alone.
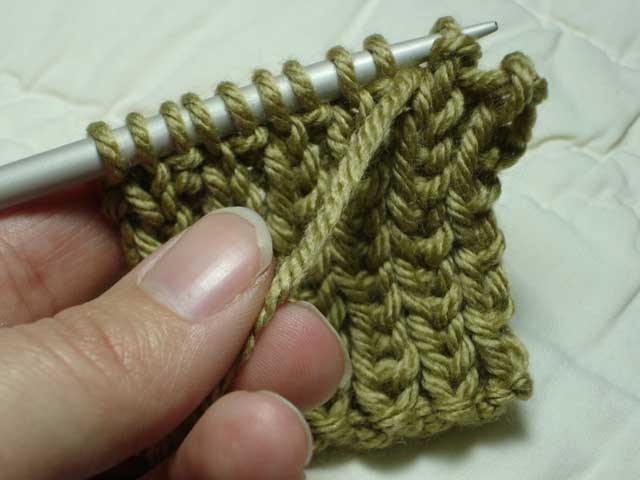
1×1 rib These instructions are for K1 P1 rib. You can tubular bind-off in other ribs, but the directions at each step will vary.
Benefits
Bind offs can often be tight, or look like they don’t quite match the rest of the knitting. A tubular bind off is very stretchy and looks professional.
Get Started
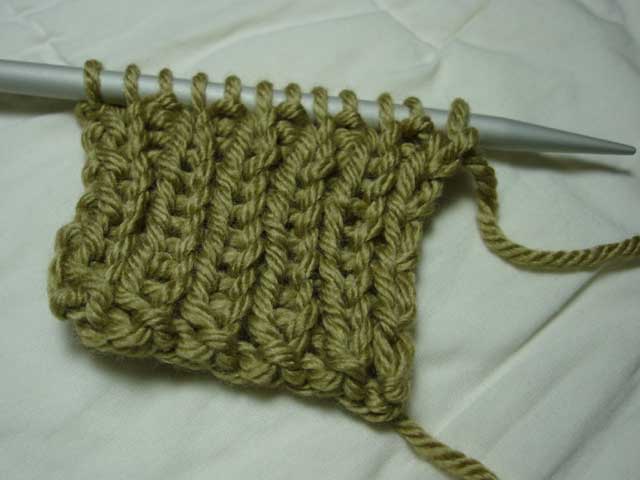
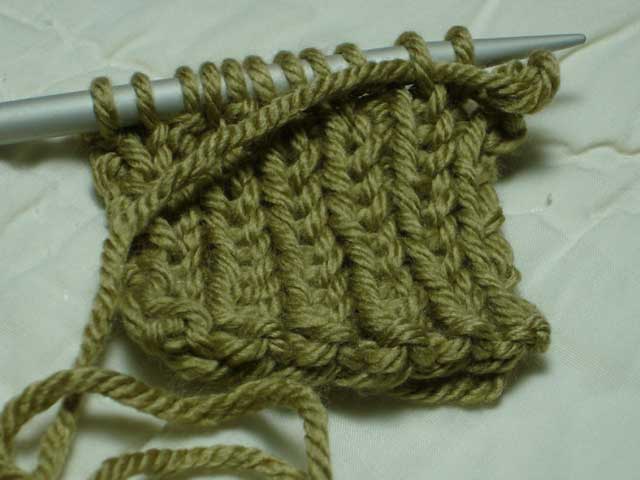
Cut your yarn and leave a tail about 4 times as long as the area you’re binding off. remember to stretch your ribbing to full width before measuring what 4 times its length is. i betcha can guess why i’m giving you this pointer..
Thread a yarn needle with the tail, sit down in a well-let area and get started.
Step 1
Insert your sewing needle knitwise into the 1st st (this will be a knit st).
Pull the yarn average-tight and drop the stitch.
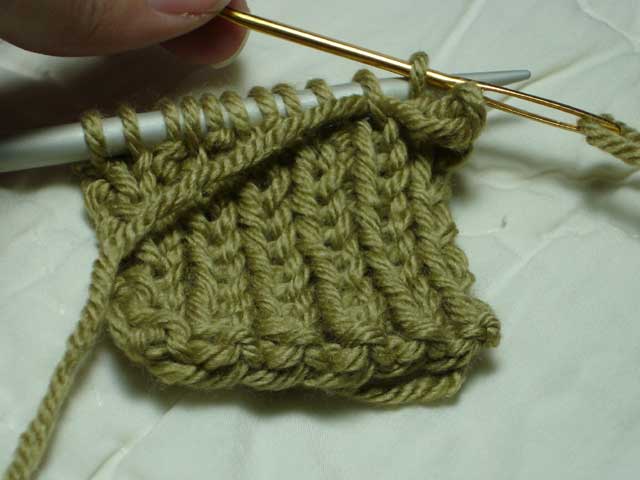
Step 2
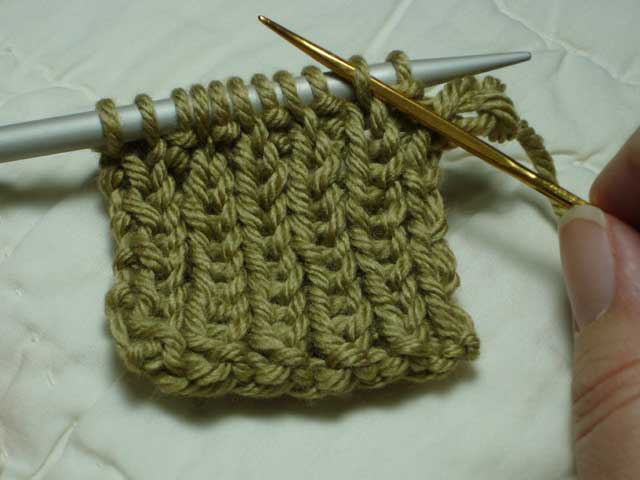
Insert your sewing needle purlwise into the second stitch on your left needle (a knit st).
Pull yarn loosely. The thread that’s left here will be spanning a stitch so you want to leave it some give. This was the step I found took the most practice to get right.
Step 3
Insert your sewing needle purlwise into the first st on your left needle (a purl stitch).
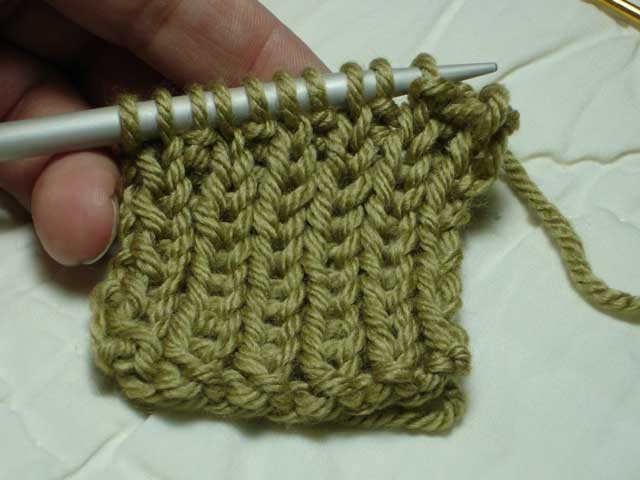
Pull it average-tight and drop the stitch.
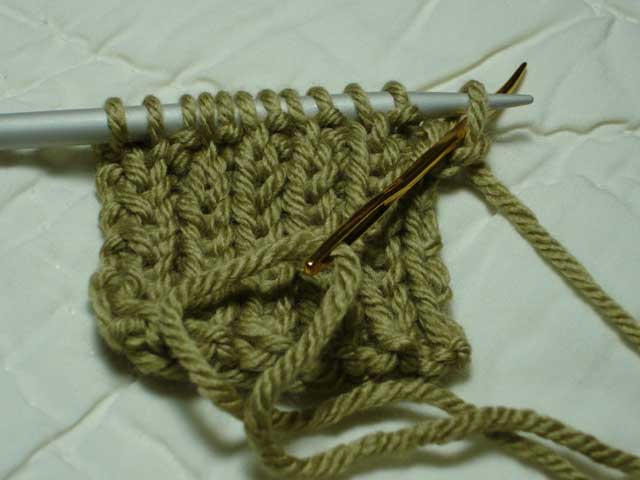
Step 4
This step sounds fiddly but it really isn’t so bad.
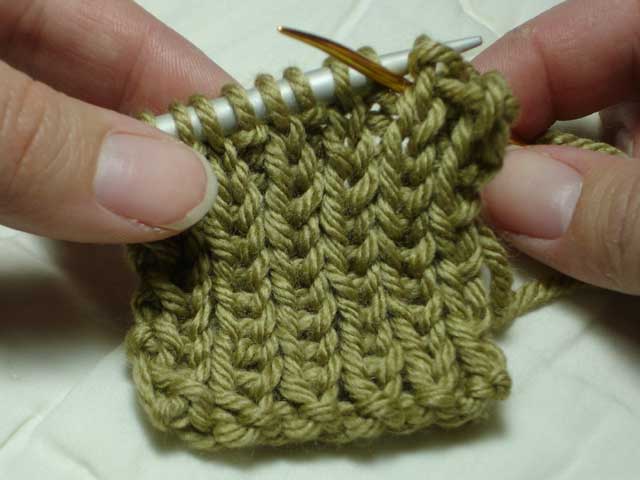
Take your yarn and needle and put it to the back of the work. Be sure not to create an unintentional YO. Insert the sewing needle between the 1st and 2nd st on the left needle.
(a) Pull the yarn through.
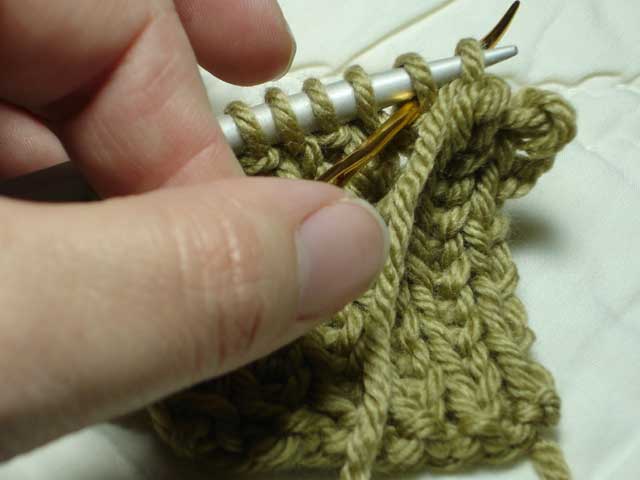
(b) And then, insert the needle knitwise into that 2nd st.
Once you get used to it you’ll be able to do parts (a) and (b) at the same time.
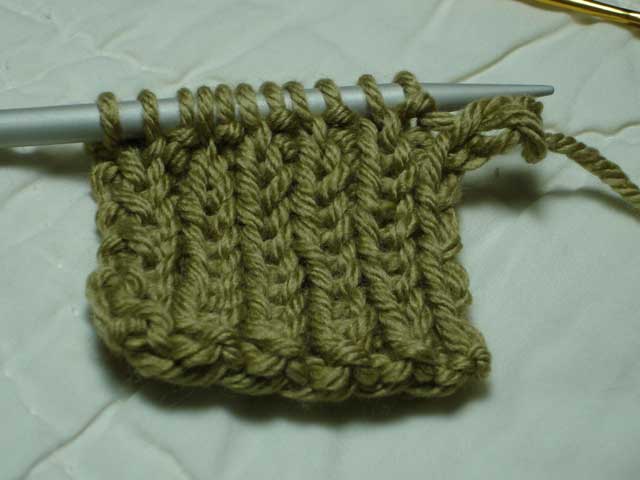
Do not drop a stitch You’ve now bound off 2 sts.
Now, go back and follow Steps 1 through 4 until you’ve bound off all your sts.
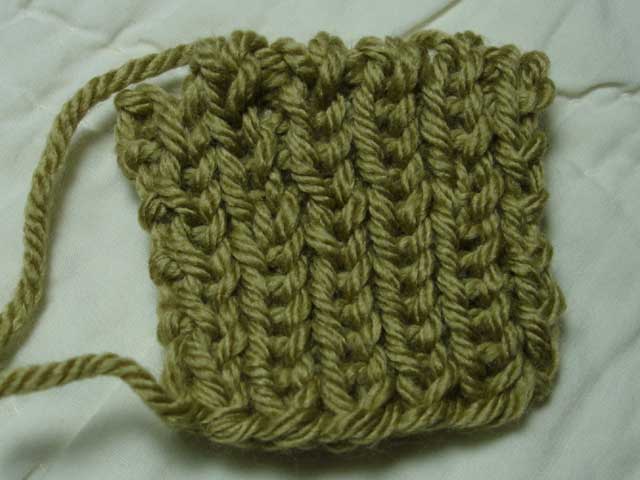
That’s it folks. It’s takes a bit more time than a regular bind off, but the results are really worth it.


Perfect timing! I was just going to google this and here it is. Thanks!
thanks for this! i think that it looks a lot like the sewn bind-off, no? i was never able to get the hang of either so i’m hoping that your tutorial will improve my skills.
I’ll have to try that method sometime. I do what I think has the same results but id executed diferently. I sil the knits onto one needle in front and the Purls onto a second needle in back and then kitchner them together. I think the result is the same, I’ll have to experiment, thanks for the tutorial!
Oooo! More techniques! Very, very nicely written.
Excellent tutorial! Thanks!!
Your timing is phenomenal. I’m getting ready to finish a sweater with tubular cast on hems and wanted to do a matching bind off on the neckline. Thanks for the tutorial!
It looks great! I’m using this on my next collar.
Thanks, this is very useful! Also, thanks for the recommendation on the book. Someone had shown me a bunch of bindoffs (like, their swatch they showed me, not how to do it), and I kept meaning to figure out a good source, but didn’t, so thanks for the tip!
The pics look great! thanks Hunny
Thank you! I did my first toe-up sock and needed this, just at this time! Very helpful pictures and clear instructions. I *really* appreciate it!
Excellent!! Thanks for this.
I’ve used your tutorial twice to bind off toe-up socks, and it makes a much prettier edge than a standard cast-off. Thanks so much!
Thank you so much for the Tutorial. You did a much better job in explanation than Monste did.
Thanks for the wonderful pictures. i’m going to link this from my blog.
Thanks!
I just wanted you to know that I love your instructions for this bind off. For all the instructions I have read, yours made the most sense to me! And I have been plugging it at my site, just wanted to let you know, as well as to say “thank you”.
I just finished my first tubular cast-off on a Noro striped scarf, and it looks great thanks to your excellent tutorial. The photos do a great job in illustrating your descriptions. Thank you for taking the time to share.
This makes no sense to me – sorry – I can’t figure out how to go back and do step one since the yarn is now sticking out the back of the stitch that I am supposed to slip off? I don’t get it.
Thanks for ur tip, i’m finding the way for binding off neck edge. It’s very useful.
Thought you’d want to know your tutorial is still helping people almost 2 years later. I love the Knitter’s Handbook too, my copy is well-loved, but there is nothing like real step-by-step pictures!
I just got a question on the step 4 (b) if anybody could help. Once you “insert the needle knitwise into that 2nd st”, do you pull the yarn through and then go back repeat the Step 1 to 4. Thanks a lot!
Thanks. Very helpful. I couldn’t find this in any of my books. You explained it so well!
WOW, what a helpful and comprehensive tutorial! Thanks so much!
Your tubular bind off has made a difference on my project.
grateful
Wow! I’ve been looking around for a good 1×1 BO, and this one seems like the answer to my prayers–I actually did the first section too loose!
Thank you so much for the wonderful instructions and photos. I’ve been looking through a bunch of tubular BO method, and yours is by far the BEST! It’s clear, easy to follow! I’m going to link this to my blog. Thanks again!
Hi. This is the tutorial that taught me how to do a tubular bind-off. Would it be alright with you if I include a link to it in a sock pattern I wrote using this bind-off? It would just be for people who aren’t already familiar with it. Thanks either way!
well hey there guys, i’ve been looking all over the internet for a GOOD black hat SEO forum.. I was looking for some suggestions
from you guys to point me in the right direction.
Thanks a bunch, this place is great btw.
hi Theres some great entries here, please check this site bejeweled cheat
http://www.bejeweledcheat.info bejeweled cheat on facebook
No way!
This Evening I got a message from 9722840600 – 972-284-0600 and was convinced the the person calling was a scam.
I decided to file a complaint with the the number and bitch.
Anyway… Gulf Coast Western -an Oil drilling corporation- was calling me back to approve my job application – apparently I got the job!
Any idea how to uncomplain and fix this???
Talk About Delirious!
This Evening I received a call from 9722840600 / 972-284-0600 and was convinced the the person calling was a scam.
I decided to complain to the the company (Gulf Coast Western) and bitch.
Check this out… Gulf Coast Western -an Oil drilling corporation- was calling who I interviewed with last month – we’re calling to tell me I got the job!
Anybody know how I can fix this???
WTF!
Earlier today I received a call from (+972) 284-0600 / (+972) 2840600 and I thought the call was a scammer.
I’m so sick and tired of promotional calls – I decided to complain to the the company (Gulf Coast Western) and yell.
You will never believe it… Gulf Coast Western -an Oil drilling corporation- called me back was returning a call from last months interview – telling me I got the job
How do I fix the complaints?!!
I have been searching for this! The instructions are so clear. Thanks! Is it okay to print this and share it with some friends I knit with? I will credit the copies with this site, of course.
No way!
Earlier today I received a phone message from 972-284-0600 & 9722840600 and for some reason thought the the person calling was a scam.
So I complained and contacted the the company and yell.
Check this out… Gulf Coast Western -an oil corporation- was trying to make contact to approve my job application – apparently I got the job!
I think I’m soooo fired!!!!???